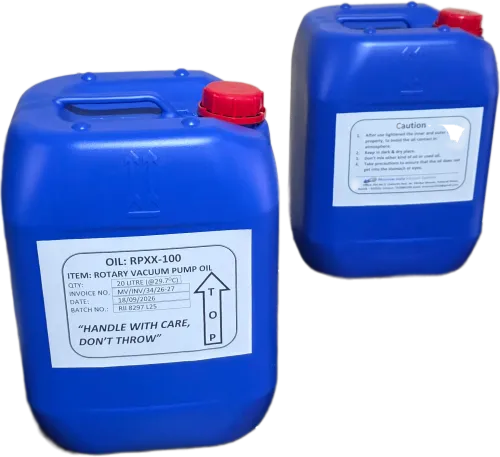


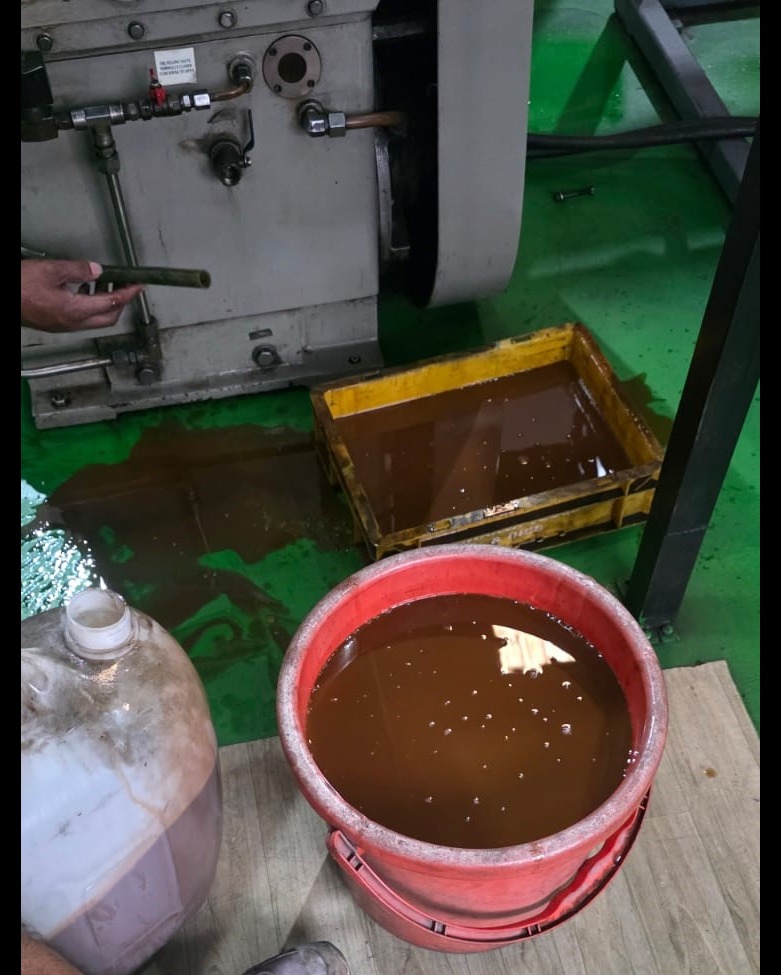
Below is a more formal SOP suitable for Moonvac India Vacuum Systems for a mechanical piston vacuum pump with contaminated lubricating oil. The exact flushing oil and quantity should be confirmed against the specific pump model; manufacturers commonly caution against mixing incompatible lubricants.
MOONVAC INDIA VACUUM SYSTEMS
Standard Operating Procedure (SOP)
Mechanical Piston Vacuum Pump – Contaminated Oil Flushing & Replacement
Document No.: MIVS-MPVP-SOP-001
Revision: 00
Application: Oil-Lubricated Mechanical Piston Vacuum Pumps
1. Purpose
The purpose of this procedure is to safely remove contaminated lubricating oil and residual contamination from a mechanical piston vacuum pump and refill the pump with fresh, approved vacuum pump oil.
This procedure is intended to remove contamination such as:
- Process vapours
- Moisture/water
- Emulsified oil
- Dust and particulate matter
- Sludge and deposits
- Degraded/oxidized oil
- Other process-related contaminants
Note: Oil flushing removes contamination from the lubrication system; it does not replace mechanical cleaning when heavy deposits, damaged components, or severe internal contamination are present.
2. Safety Precautions
Before starting the procedure:
- Stop the vacuum pump.
- Isolate the pump from the electrical supply and apply Lockout/Tagout (LOTO).
- Isolate the pump from the vacuum/process system.
- Vent the pump to a safe pressure before maintenance.
- Allow hot surfaces and oil to cool to a safe handling temperature.
- Wear safety gloves, safety goggles and suitable protective clothing.
- If the pumped process contains hazardous chemicals, follow the applicable plant decontamination procedure and use the appropriate PPE.
- Collect all used oil in a suitable labelled container.
- Dispose of contaminated oil according to applicable environmental regulations.
3. Materials Required
- Approved vacuum pump flushing oil
- New vacuum pump operating oil recommended for the pump
- Clean oil collection container
- Drain pan
- Clean funnel
- Lint-free cloth
- Suitable hand tools
- Replacement drain-plug gasket/O-ring, if required
- New oil filter, if fitted
- Oil sample bottles, if required
Important: Do not use diesel, kerosene, petrol, thinner or other unapproved solvents as flushing oil. Use only a flushing fluid approved by the pump manufacturer.
4. Preliminary Inspection
Before draining the oil, inspect and record:
- Pump model and serial number
- Operating hours
- Existing oil type
- Oil level
- Oil colour
- Oil viscosity/appearance
- Presence of water or milky emulsion
- Presence of metal particles
- Sludge/deposits
- Unusual smell
- Pump temperature
- Vacuum level/ultimate vacuum
Take a small sample of the contaminated oil if laboratory analysis or contamination identification is required.
5. Warm-Up Before Oil Draining
If the pump is safe to operate:
- Start the pump under normal conditions.
- Allow the pump to operate for approximately 10–15 minutes so that the oil becomes warm and flows more easily.
- Isolate the pump from the process before flushing.
- Stop the pump.
- Isolate the electrical supply.
Oil changes are generally easier when the oil is warm, but personnel must be protected against hot oil and hot pump surfaces. Manufacturer procedures also commonly specify draining warm oil.
6. Drain Contaminated Oil
- Place a suitable drain container below the pump oil drain point.
- Remove/open the oil filler/vent plug as applicable.
- Open the oil drain plug.
- Allow the contaminated oil to drain completely.
- If permitted by the pump design, carefully tilt the pump to remove residual oil.
- For belt-driven piston pumps, rotate the mechanism/pulley manually if the manufacturer permits this, so trapped oil can drain from internal low points.
- Close the drain plug temporarily.
- Restart/operate the pump for approximately 30–60 seconds only, with the inlet appropriately vented/isolated according to the pump manufacturer's procedure, to help return residual oil from lubrication passages.
- Stop and isolate the pump again.
- Open the drain plug and drain the remaining oil.
Do not operate the pump without the minimum oil required by its manufacturer's procedure.
7. Inspect and Clean the Oil Reservoir
After draining:
- Inspect the oil reservoir/crankcase.
- Inspect the drain plug and magnetic plug, if fitted.
- Remove accessible sludge using a clean lint-free cloth.
- Clean the oil sight glass if contamination prevents accurate oil-level observation.
- Inspect the oil filter, if fitted.
- Replace a contaminated or blocked filter.
- Inspect accessible lubrication passages for sludge or deposits.
Do not introduce compressed air or unapproved solvent into internal pump passages.
If heavy sludge, carbonized oil, metal particles, or process deposits are found, the pump should be opened and mechanically inspected rather than relying only on an oil flush. Some piston-pump manuals specifically require cleaning of the valve chamber and components when oil contamination is severe.
8. First Oil Flushing
8.1 Fill with Flushing Oil
- Confirm that the selected flushing oil is compatible with the pump.
- Close the oil drain plug.
- Fill the pump with the approved flushing oil.
- Fill only to the manufacturer's specified operating level/sight-glass mark.
- Do not overfill the pump.
8.2 Run the Pump
- Isolate the pump inlet from the process system.
- Start the pump.
- Allow the pump to operate under safe conditions.
- If the pump is equipped with a gas-ballast arrangement, use it according to the manufacturer's instructions where moisture/condensable contamination is suspected.
- Run the pump for approximately 20–30 minutes for the first flushing cycle, unless the pump manufacturer specifies a different time.
- Monitor:
- Oil temperature
- Pump noise
- Vibration
- Oil level
- Leakage
- Motor current
- Pump condition
Flushing procedures for vacuum pumps commonly use a warm pump, a controlled quantity of flushing oil and a short operating period, followed by draining and inspection of the flushing oil.
9. Drain First Flushing Oil
- Stop the pump.
- Isolate the electrical supply.
- Allow the pump to reach a safe condition for draining.
- Drain the flushing oil completely.
- Collect the oil in a clean container.
- Inspect the drained flushing oil.
Check for:
- Dark colour
- Sludge
- Water
- Milky/emulsified oil
- Metal particles
- Carbon deposits
- Process residue
Compare the drained oil with a sample of unused flushing oil.
10. Second Flushing Cycle
A second flushing cycle is recommended when the first flushing oil remains significantly contaminated.
- Close the drain plug.
- Fill with fresh approved flushing oil.
- Operate the pump for another 20–30 minutes, or according to the pump manufacturer's instructions.
- If applicable, use gas ballast to assist removal of condensable moisture.
- Stop and isolate the pump.
- Drain the flushing oil completely.
- Inspect the drained oil again.
A second flush should be continued only when justified by the contamination level. Some established vacuum-pump flushing procedures specifically recommend repeating the flush when the drained oil remains strongly discoloured.
11. Acceptance Criteria for Flushing
The flushing operation may be considered satisfactory when:
- No visible sludge remains in accessible areas.
- No significant water/emulsion is present.
- No abnormal quantity of metal particles is present.
- Drained flushing oil is substantially cleaner than the original contaminated oil.
- No abnormal deposits are observed.
- The pump operates without abnormal noise or vibration.
Important: '100% removal' of microscopic contamination cannot normally be guaranteed by oil flushing alone. If absolute cleanliness is required for a particular process, the pump should undergo internal inspection/cleaning and, where appropriate, oil sampling and laboratory analysis.
12. Final Filling with New Vacuum Pump Oil
- Ensure that all flushing oil has been drained.
- Install/secure the drain plug with a new gasket/O-ring if required.
- Install a new oil filter if applicable.
- Confirm the correct oil specification.
- Fill the pump with new manufacturer-approved vacuum pump oil.
- Fill to the specified oil level.
- Do not mix different oil grades, brands or lubricant chemistries unless compatibility has been confirmed.
- Clean the filler area.
- Reinstall the oil filler plug.
Using the correct manufacturer-specified lubricant is important because incompatible or incorrect oils can adversely affect pump performance and service life.
13. Final Commissioning
- Confirm that all drain/filler plugs are secure.
- Confirm that the pump is correctly connected to the vacuum system.
- Confirm correct motor rotation.
- Start the pump.
- Check for oil leakage.
- Check oil level.
- Monitor pump temperature.
- Check vibration and abnormal noise.
- Check motor current.
- Check the achieved vacuum.
- Operate the pump for approximately 30–60 minutes under normal conditions.
- Recheck the oil appearance after operation.
If the oil quickly becomes contaminated again, do not simply repeat oil changes. Investigate the source of contamination in the process/vacuum system.

15. Preventive Measures
To reduce future oil contamination:
- Prevent liquid carryover into the vacuum pump.
- Install an appropriate condensate separator where required.
- Use suitable inlet filtration.
- Use gas ballast when specified for condensable vapours.
- Maintain correct pump operating temperature.
- Monitor oil colour and condition regularly.
- Maintain the correct oil level.
- Replace oil at the manufacturer's recommended interval.
- Check vacuum-system leaks.
- Keep the pump exhaust and oil recovery system clean.
- Do not mix incompatible oils.
For water-vapour applications, operating the pump appropriately and using gas ballast can help remove condensed water from the oil; however, severe contamination still requires oil draining/replacement.
16. Maintenance Record
Customer: __________________________
Pump: Mechanical Piston Vacuum Pump
Model: _____________________________
Serial No.: ________________________
Date: ______________________________
Operating Hours: ___________________
Contamination Type:
☐ Water
☐ Process chemical
☐ Sludge
☐ Dust/particles
☐ Metal particles
☐ Emulsified oil
☐ Other: __________________
Initial Oil Condition: _______________
Flushing Oil: ________________________
Flushing Cycle 1: ___________________
Flushing Cycle 2: ___________________
Final Oil: ___________________________
Final Oil Quantity: __________________
Filter Replaced: Yes / No
Final Vacuum: _______________________
Pump Temperature: __________________
Remarks: ___________________________
Technician: _________________________
Approved By: ________________________
17. Important Technical Note
This SOP is a general Moonvac India Vacuum Systems maintenance procedure and should be used together with the specific pump manufacturer's operating manual.
Oil capacity, oil grade, flushing-fluid specification, gas-ballast procedure, permissible running time and oil-level setting are model-specific. Do not assume the same values apply to every mechanical piston vacuum pump.
For a severely contaminated pump—especially where metal particles, hardened deposits, chemical attack, or abnormal mechanical noise are present—an internal inspection and mechanical cleaning/overhaul may be required instead of repeated oil flushing.
This version can also be converted into a professional Moonvac India service document with “Purpose / Responsibility / Procedure / Safety / Acceptance Criteria / Checklist / Sign-off” sections, suitable for sending to a customer or using as a maintenance SOP.
Visit: www.moonvacindia.com